How often do architects build something with their own hands? We were curious to see how hard it is to build a wood pavilion, so we challenged ourselves to make things easier for you to DIY.
Our solution to optimizing the cost without cutting back on material quality, structural integrity, and aesthetics, was the use of joined wooden plank structure.
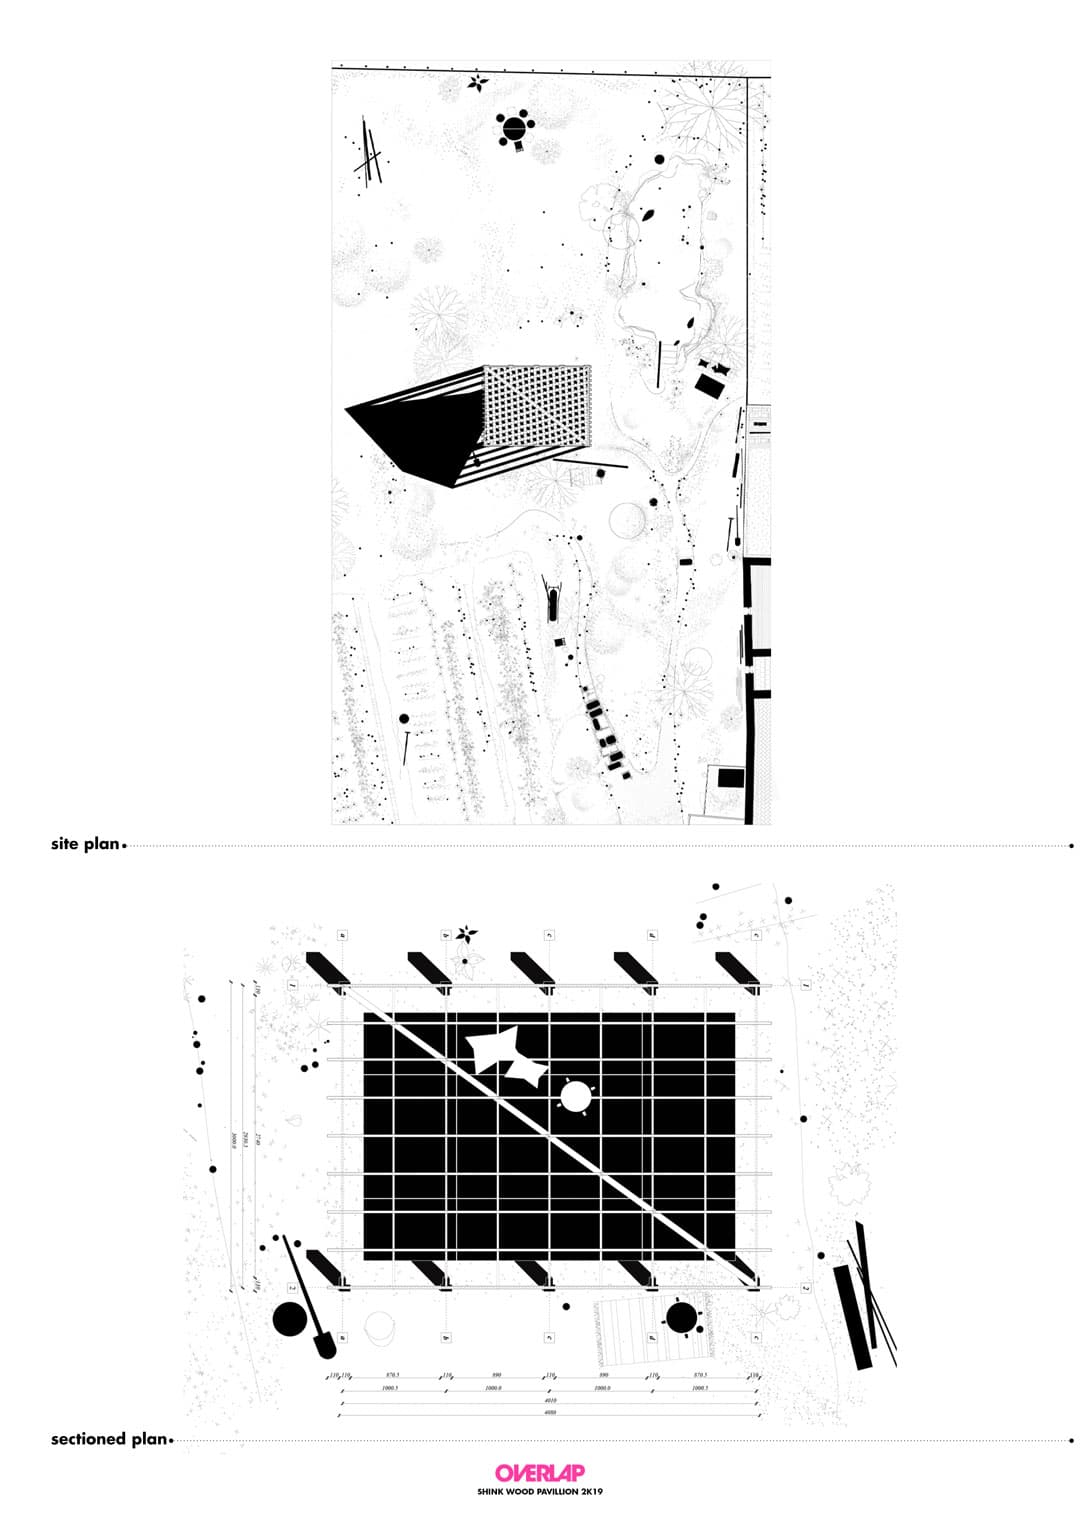
Check out the architectural drawings of this project. We also added a detailed cost estimate at the end of this post, so you can easily understand what it takes to build it!
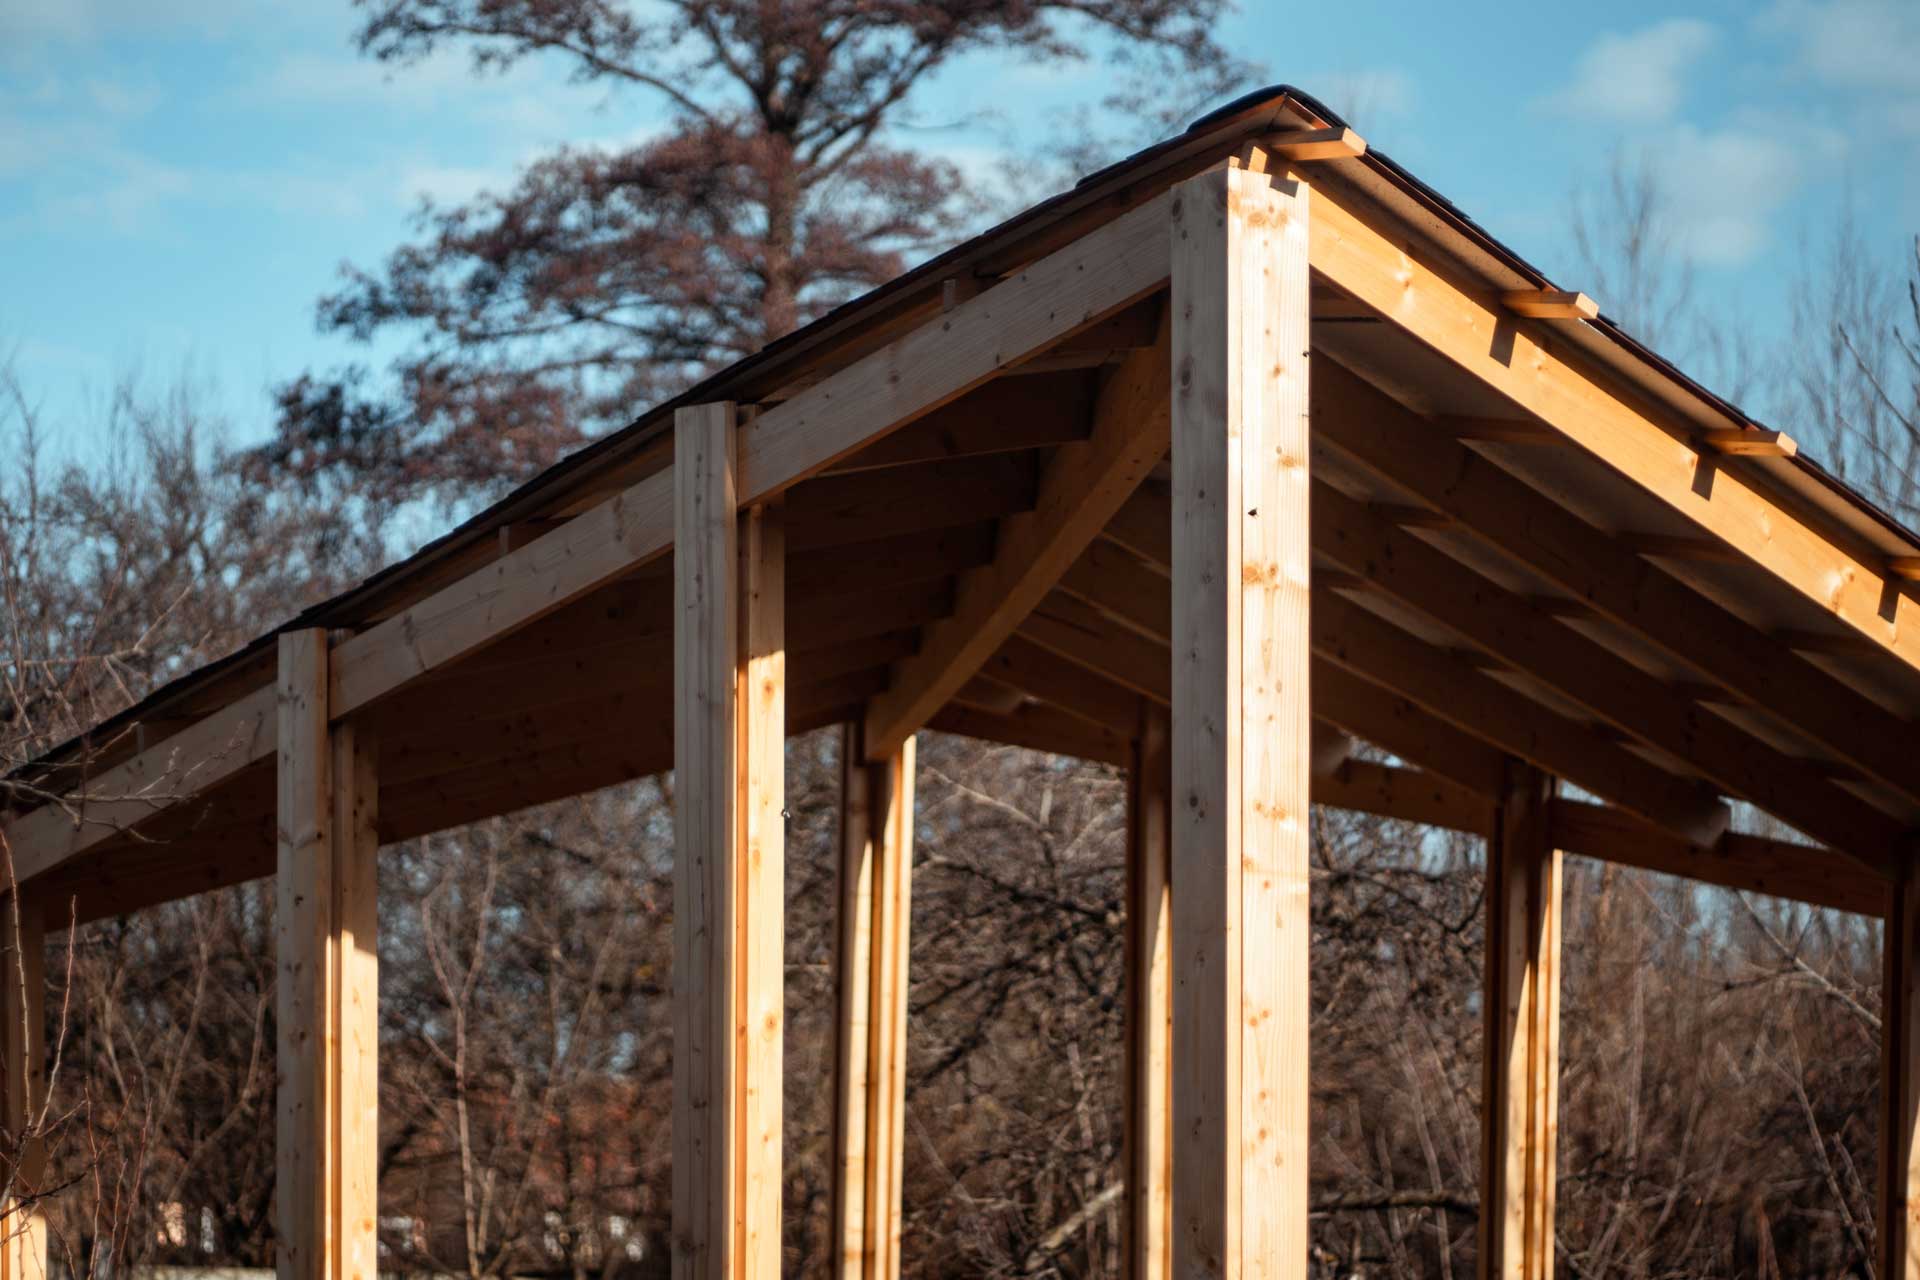
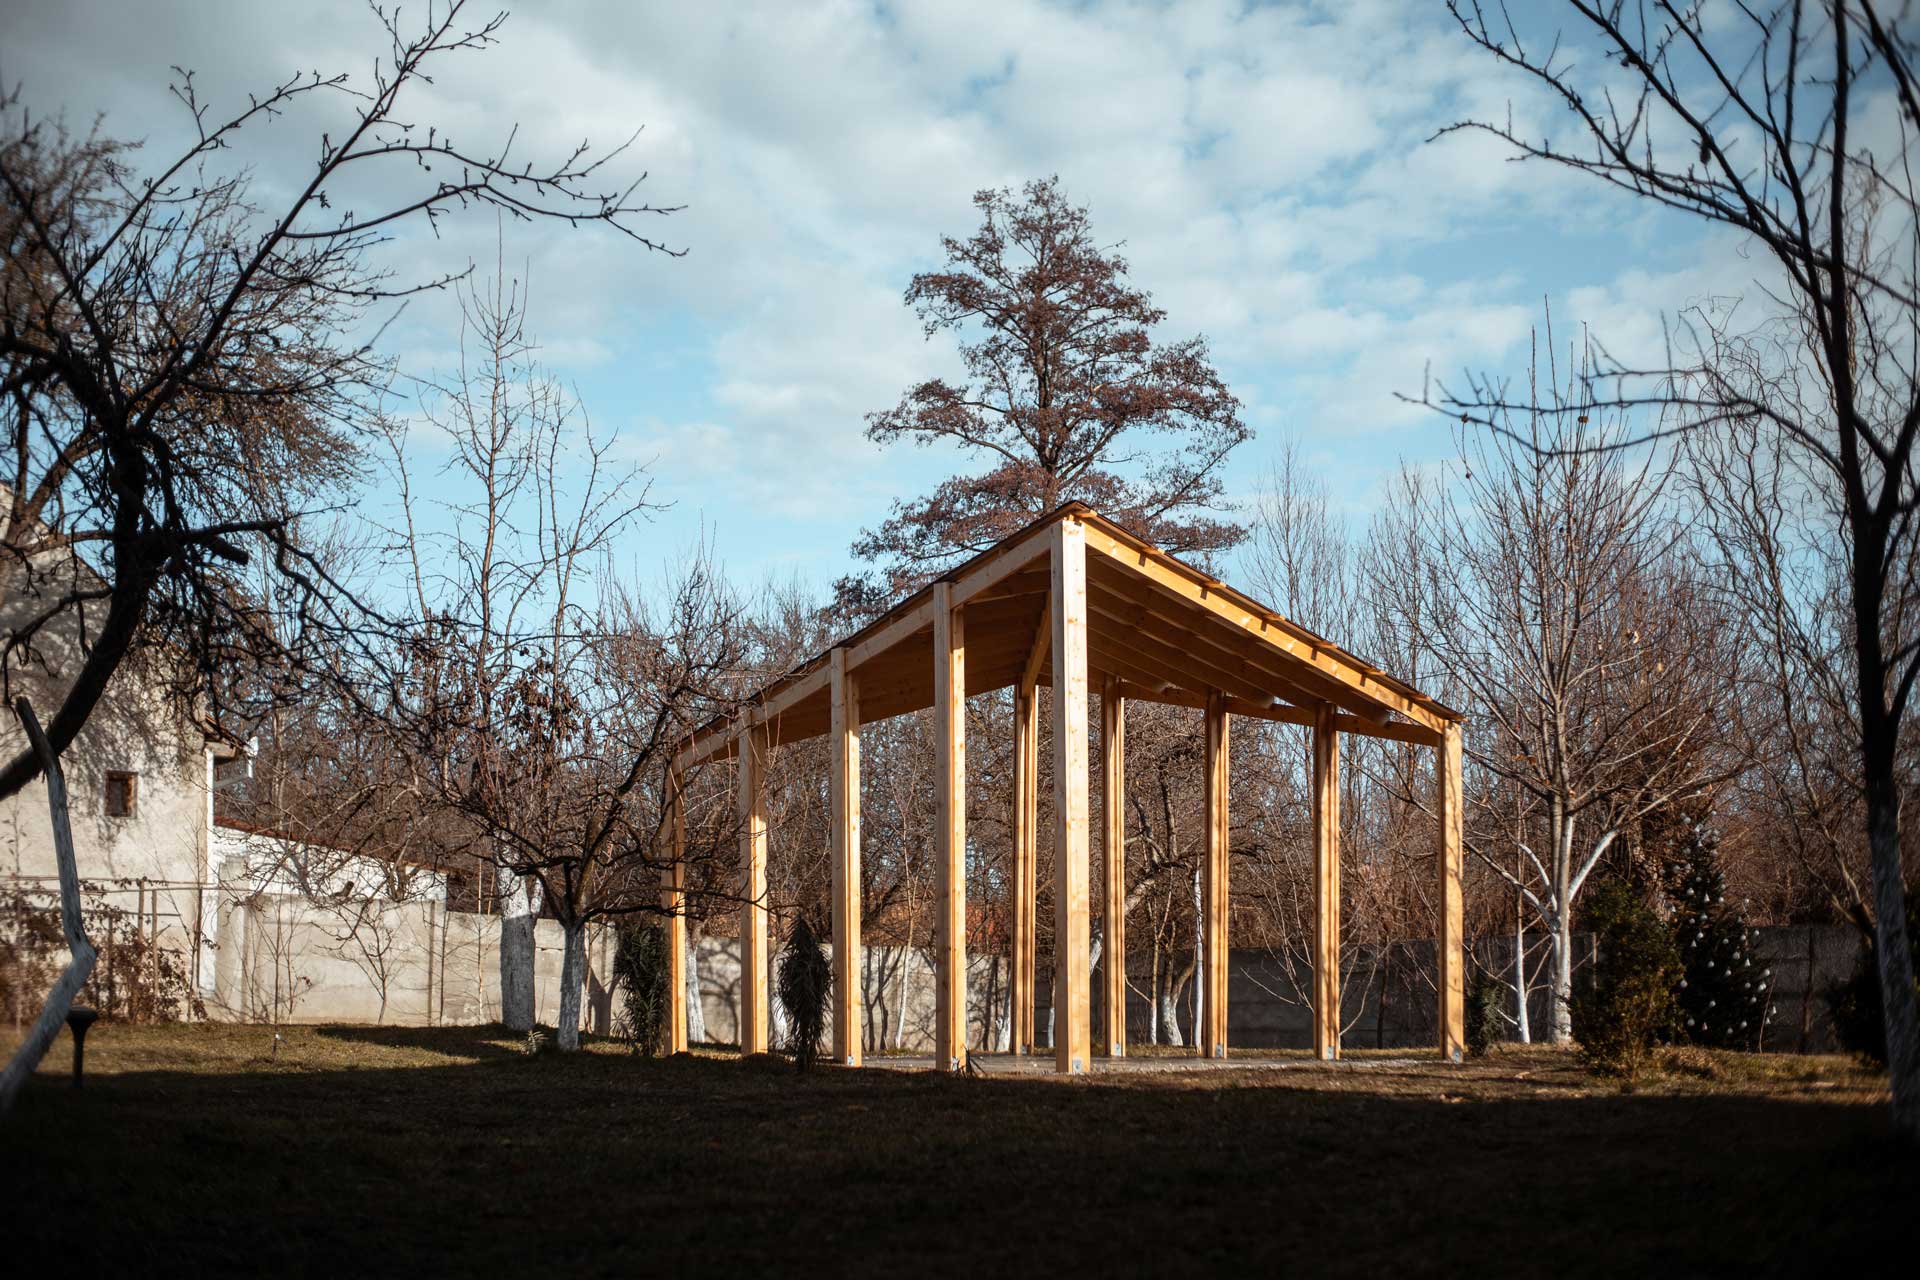
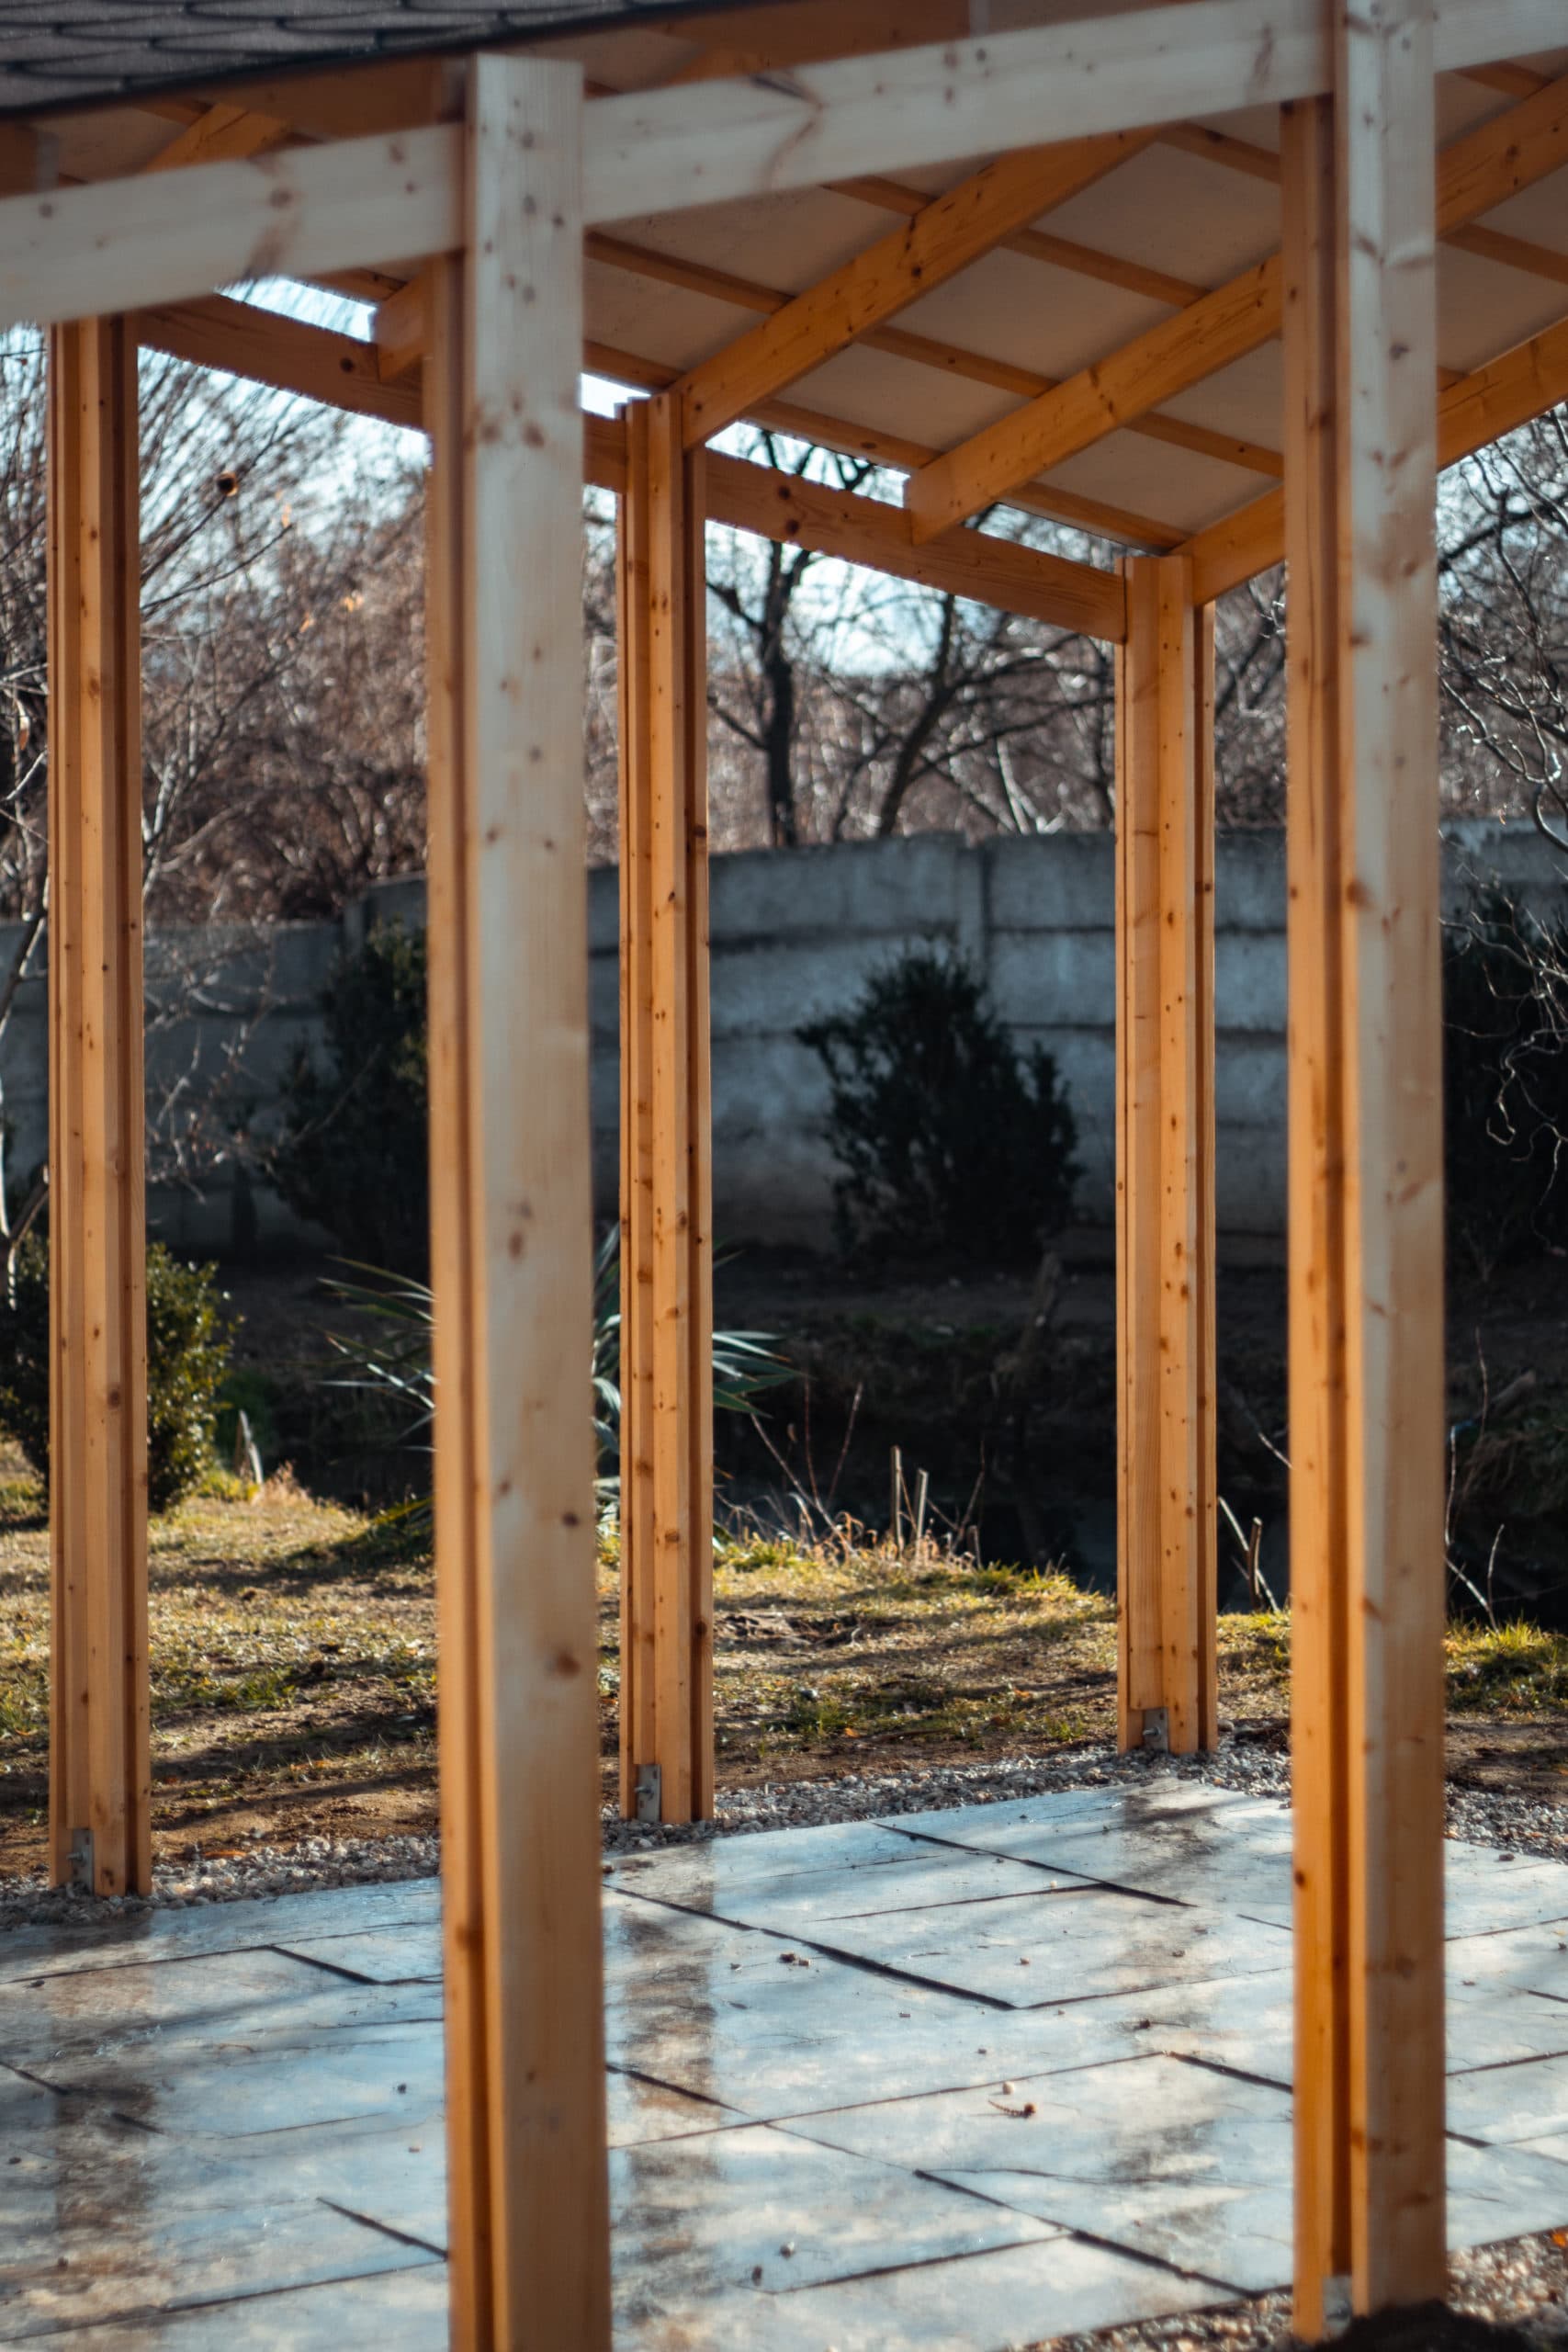
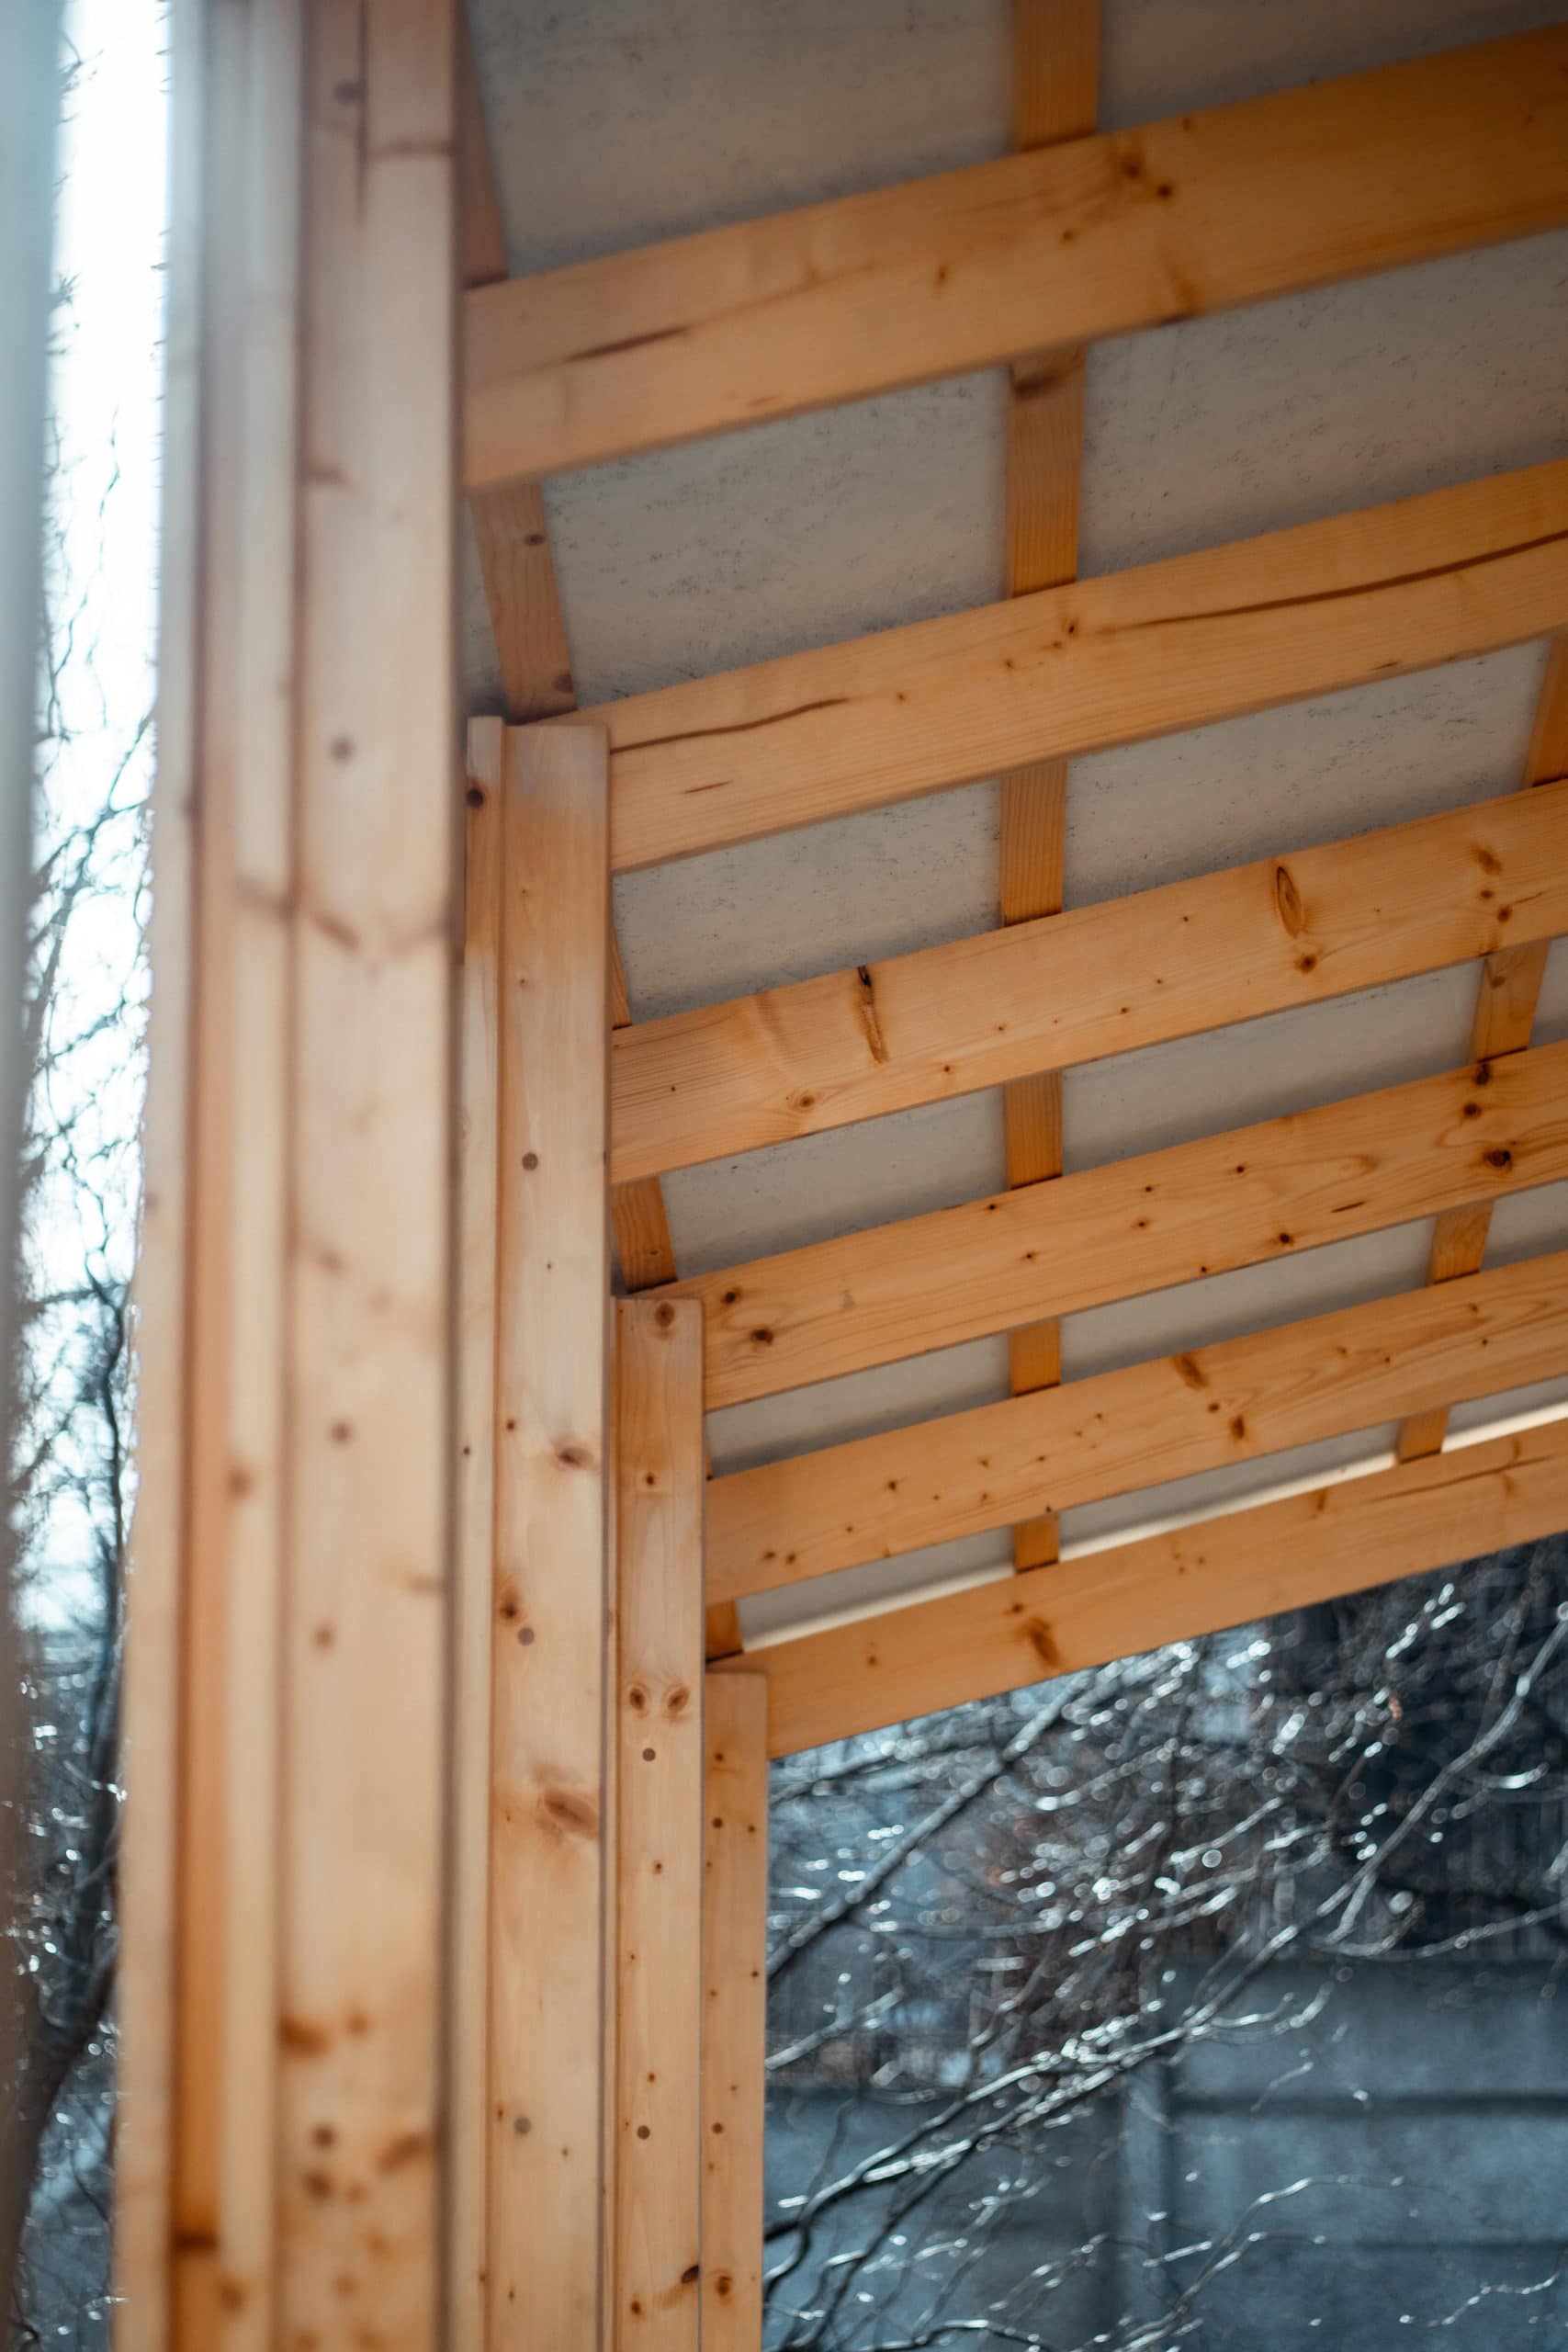
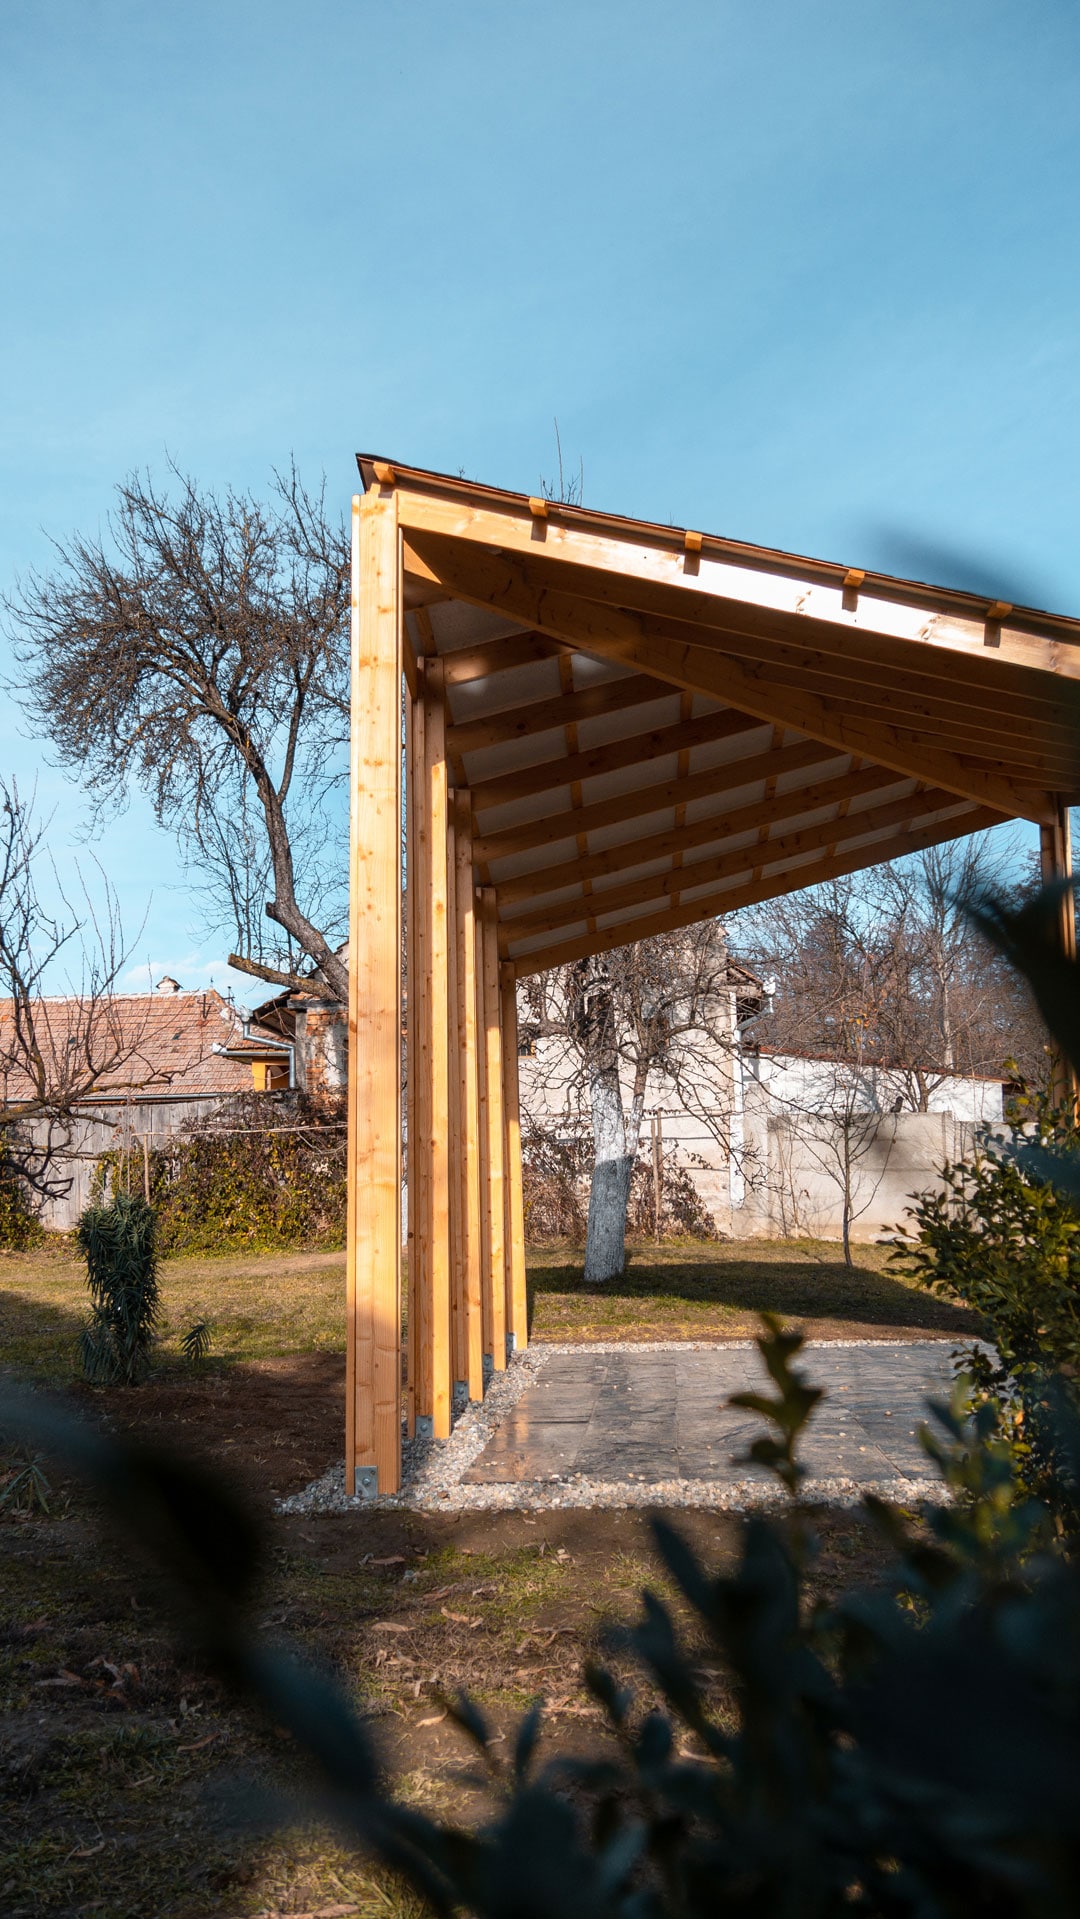
The high corner of the evergreen wood-made pavilion shows the inside of the roof in an early autumn morning sunlight. Photo taken by Laura Ioana Voinescu.
The goal? Exercise your mind, soul, and obviously your physical condition.
I believe that architects sometimes lose sight of their real purpose: building a better society by inventing the way people interact in space. Therefore, this project is our take on the non-values promoted by our current culture. People usually come to like what they see more often, and as a result they become a product of the surrounding culture, being influenced by what the marketers and media feeds them.
The mainstream wood pavilion industry is no different and often delivers bulky, expensive, and unsightly pavilions. For this reason we wanted to show a different way of building a wood structure.

Find the perfect spot for the DIY wood pavilion.
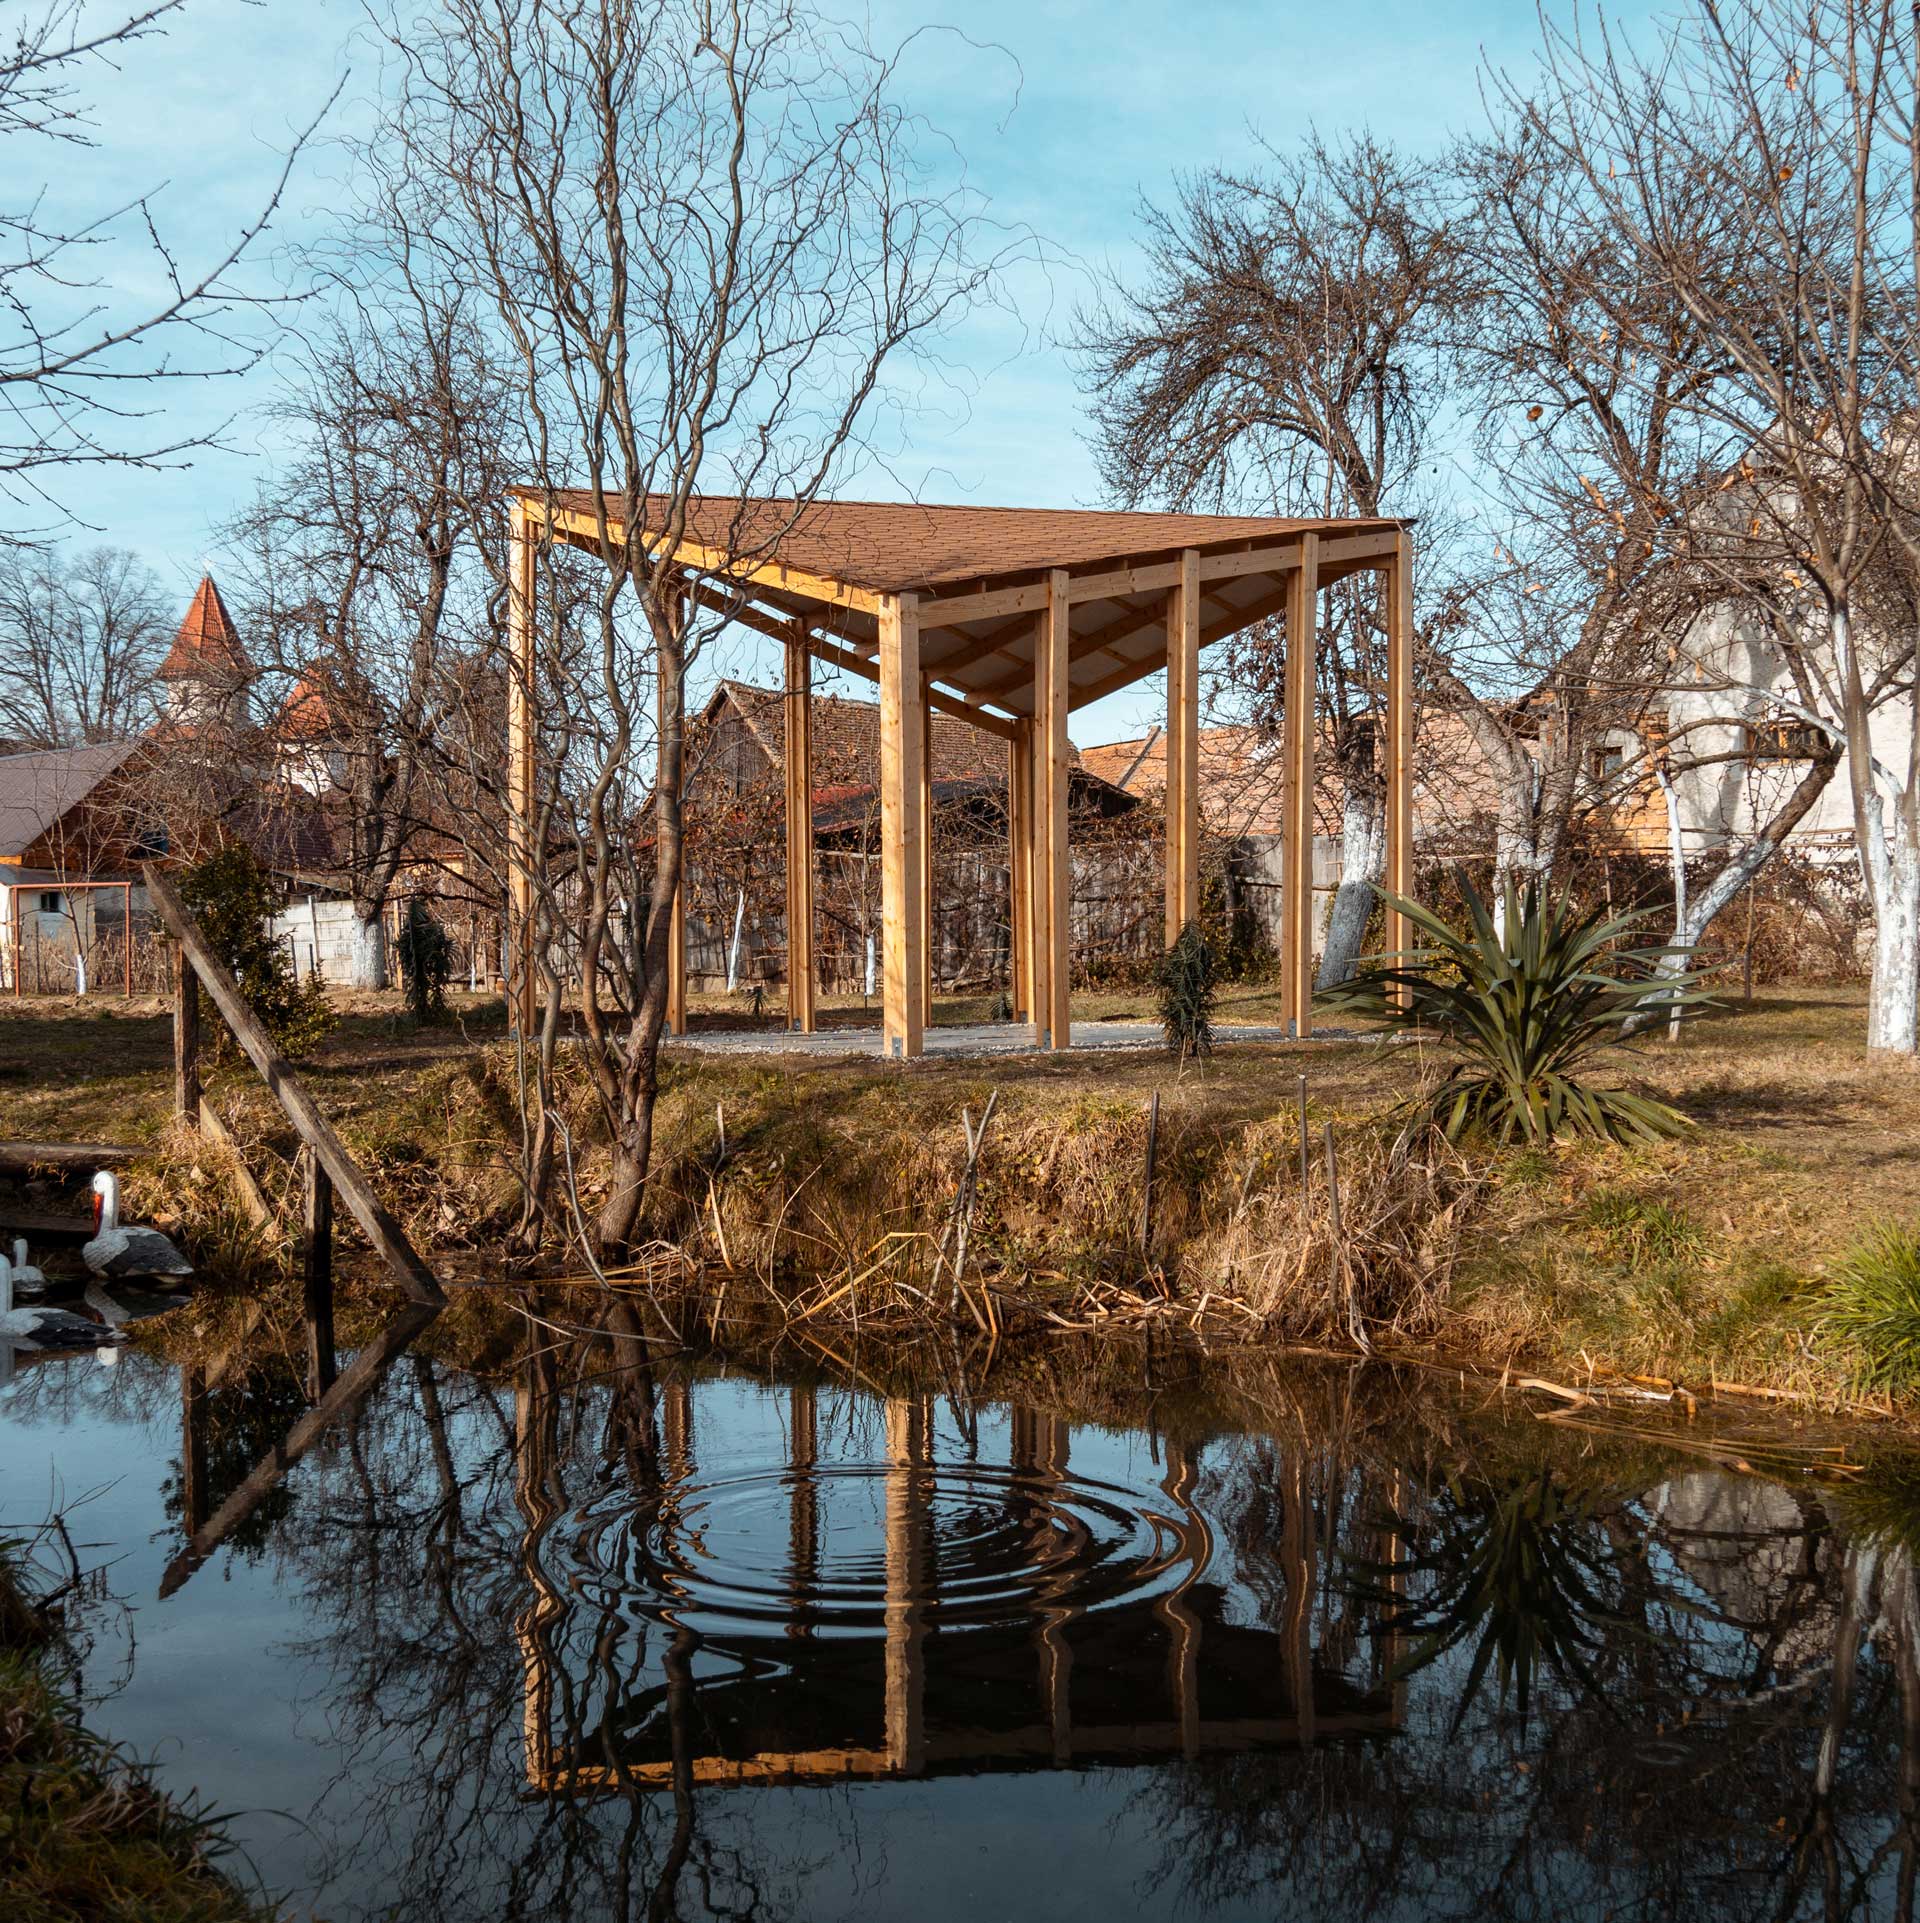
First of all, we needed a secluded built space to protect us from the fierce summer sun or the pouring rain, a place to contemplate the surroundings in our backyard. The building site is close to the small pond, in – between the apple trees and next to a future dug fire pit. In the future, we plan to add a system to enable closing the gazebo in some way – let’s call it the “closure” of the pavilion.
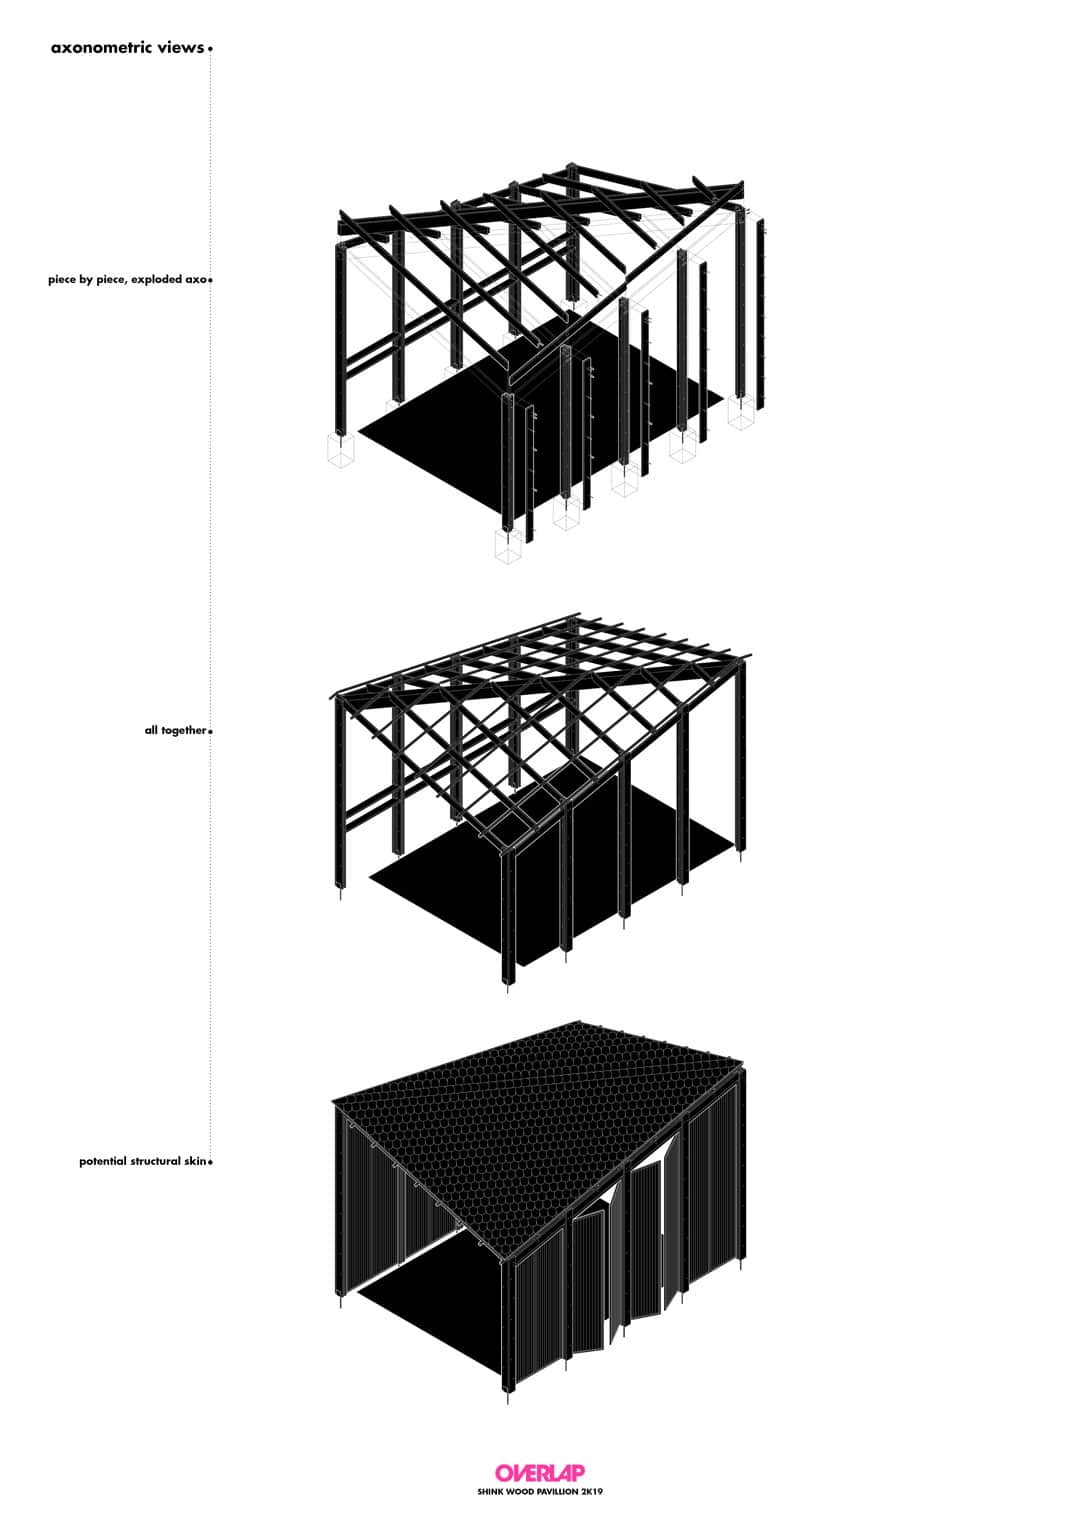
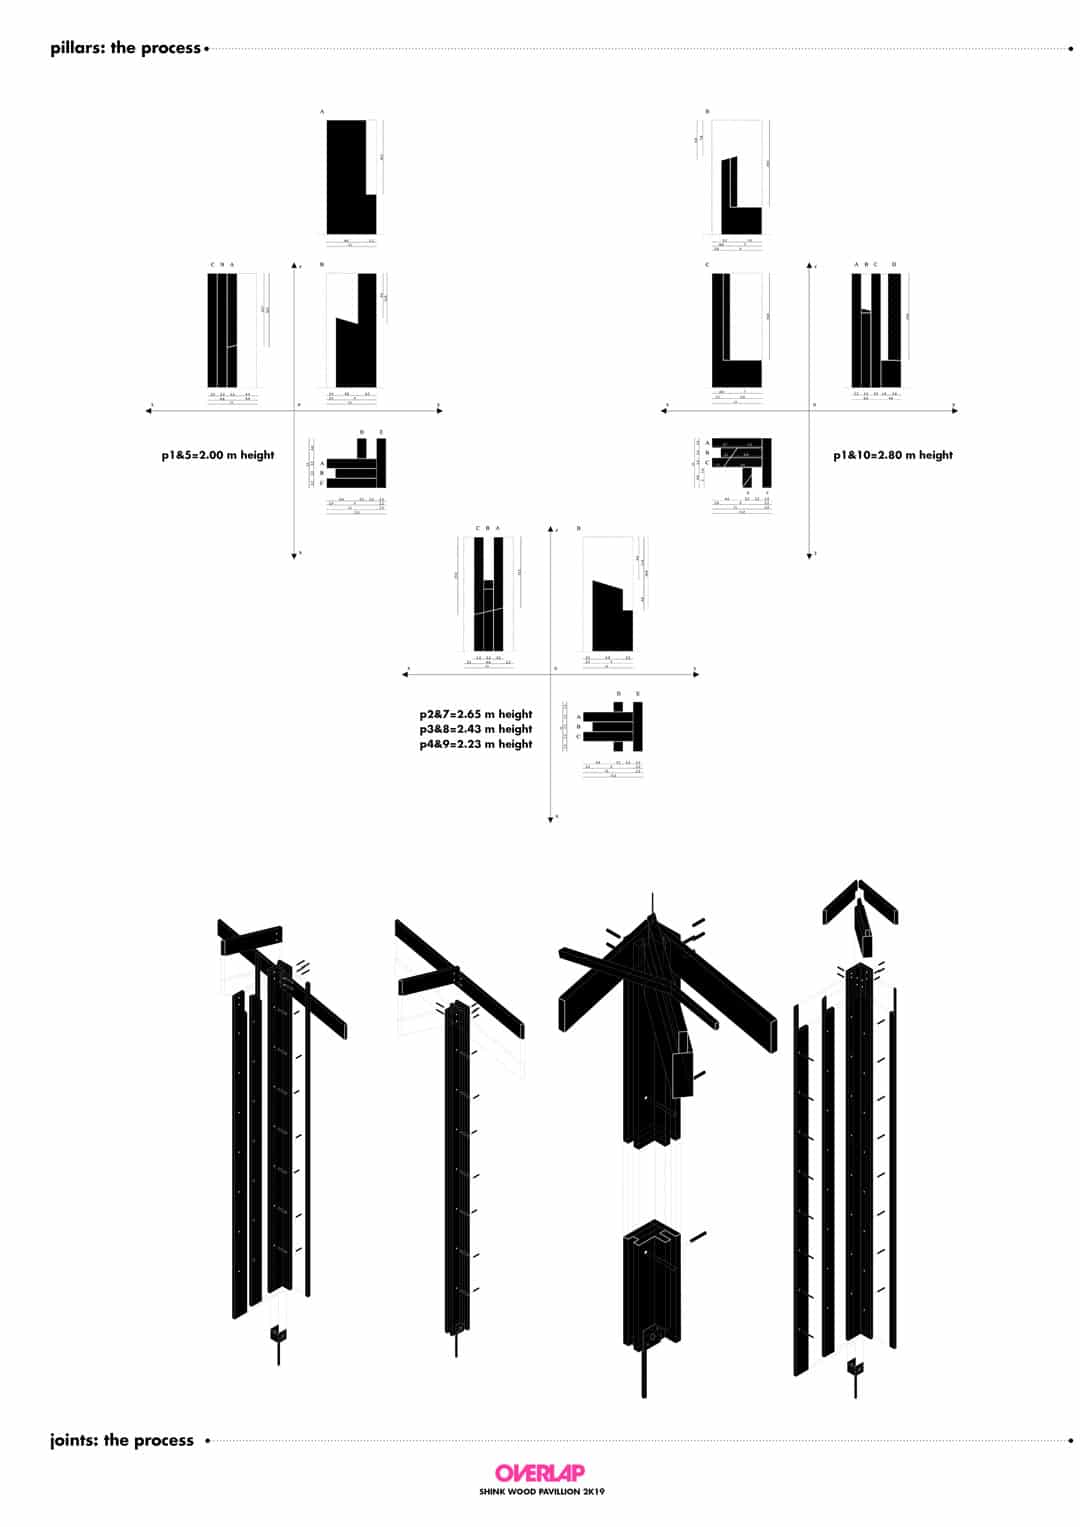
Secondly, it was a challenge for us to innovate and lower costs in building this wood pavilion. That’s why we decided to use a weak piece of wooden plank to build an actual solid structural element. The 3 – layer – sandwich pillar design offers more control over the cuts and joints while the wooden boards that make the rafters fit perfectly inside the posts. At the same time, we trimmed a bit of the inside layer, emphasizing the slenderness of the structure. Not having any screws or metal visible other than the lifted steel post base was something we aimed for, so we used dowel joints to keep the layers together.
In other words, our main goal was to test the process and adapt the structure for an easier procedure so it can be built without previous experience. We proved ourselves capable of walking through all project stages, having the physical and mental strength to spend a month in a remote village and build it ourselves.
The challenges of building a wooden gazebo by yourself.
Starting to search for timber, we soon realized that you can’t actually find two pieces with the same curvature, neither a wooden beam that is perfectly straight and stays under the budget, so working around these defects became vital. Also, taking time to cut the wood as planned actually saves time when putting the pieces together. Good planning beats hard work.
Using the dowelled tenon joint wooden planks instead of thick timber also leaves no metal screws or profiles on sight. The only structural piece that is not made of boards is the beam; yet making the pillars out of wooden planks meant we could trim the width of the inside plank layer so the rafters fitted perfectly in-between the exterior post layers while creating a nice structural detail.
How much does this wood pavilion cost?
This is what we needed in building this wood pavilion entirely:
The wood elements.
80 evergreen wood planks, 3030x109x21.5 mm
These 80 pieces will be used as follows:
17 pcs. to cover for faulty shaped pieces (53 euro).
40 planks – for the posts
10 planks – for the rafters
4 planks – for the side beams
4 planks – for the back shelves
5 planks – for making the needed wood strips out of them = 252 euro, at 3.15 euro/piece
13 beechwood strips, ø10mm, 13 linear meters – for the dowels = 3.5 euro
7 OSB boards, 6x2500x1250 mm = 56 euro
1 KVH evergreen wood beam, 6500x160x60 mm = 35 euro
The roof.
8 roof overhanging metal sheets 2000x208x0.45 mm, 16 linear meters – cut for the roof border = 30 euro
20 lm woven polyethylene foil, 75gr/sqm,
1.5×50 lm hydro-insulation, used under the bitumen shingles = 20 euro
11 bitumen shingles packs, 1000×333 mm 3sqm/pack, used to make the roof ridge as well = 60 euro
2000 self-drilling flat truss screws, 10mm long for putting up the shingles on the roof = 20 euro
The metal parts.
10 zinc plated metal post bases, 81x100x200 mm = 30 euro
10 hex bolts, 80mm long for securing the post into the metal bases = 1.5 euro
40 wood screws, 50mm long, for securing posts in the metal base = 1 euro
1000 wood screws, 35mm long for putting together the pillars out of wood planks = 5 euro
The adhesive, varnish & pavement:
wood adhesive, 750g = 11.5 euro
colourless wood protection & colourless no gloss varnish, 1.5 l each = 18 euro
8 cement bags, 50kg each for the posts foundation, and the pavement base = 40 euro
1cbm of sand; 1cbm of gravel 5mm = 30 euro
1 bag of mortar, CM17 = 13 euro
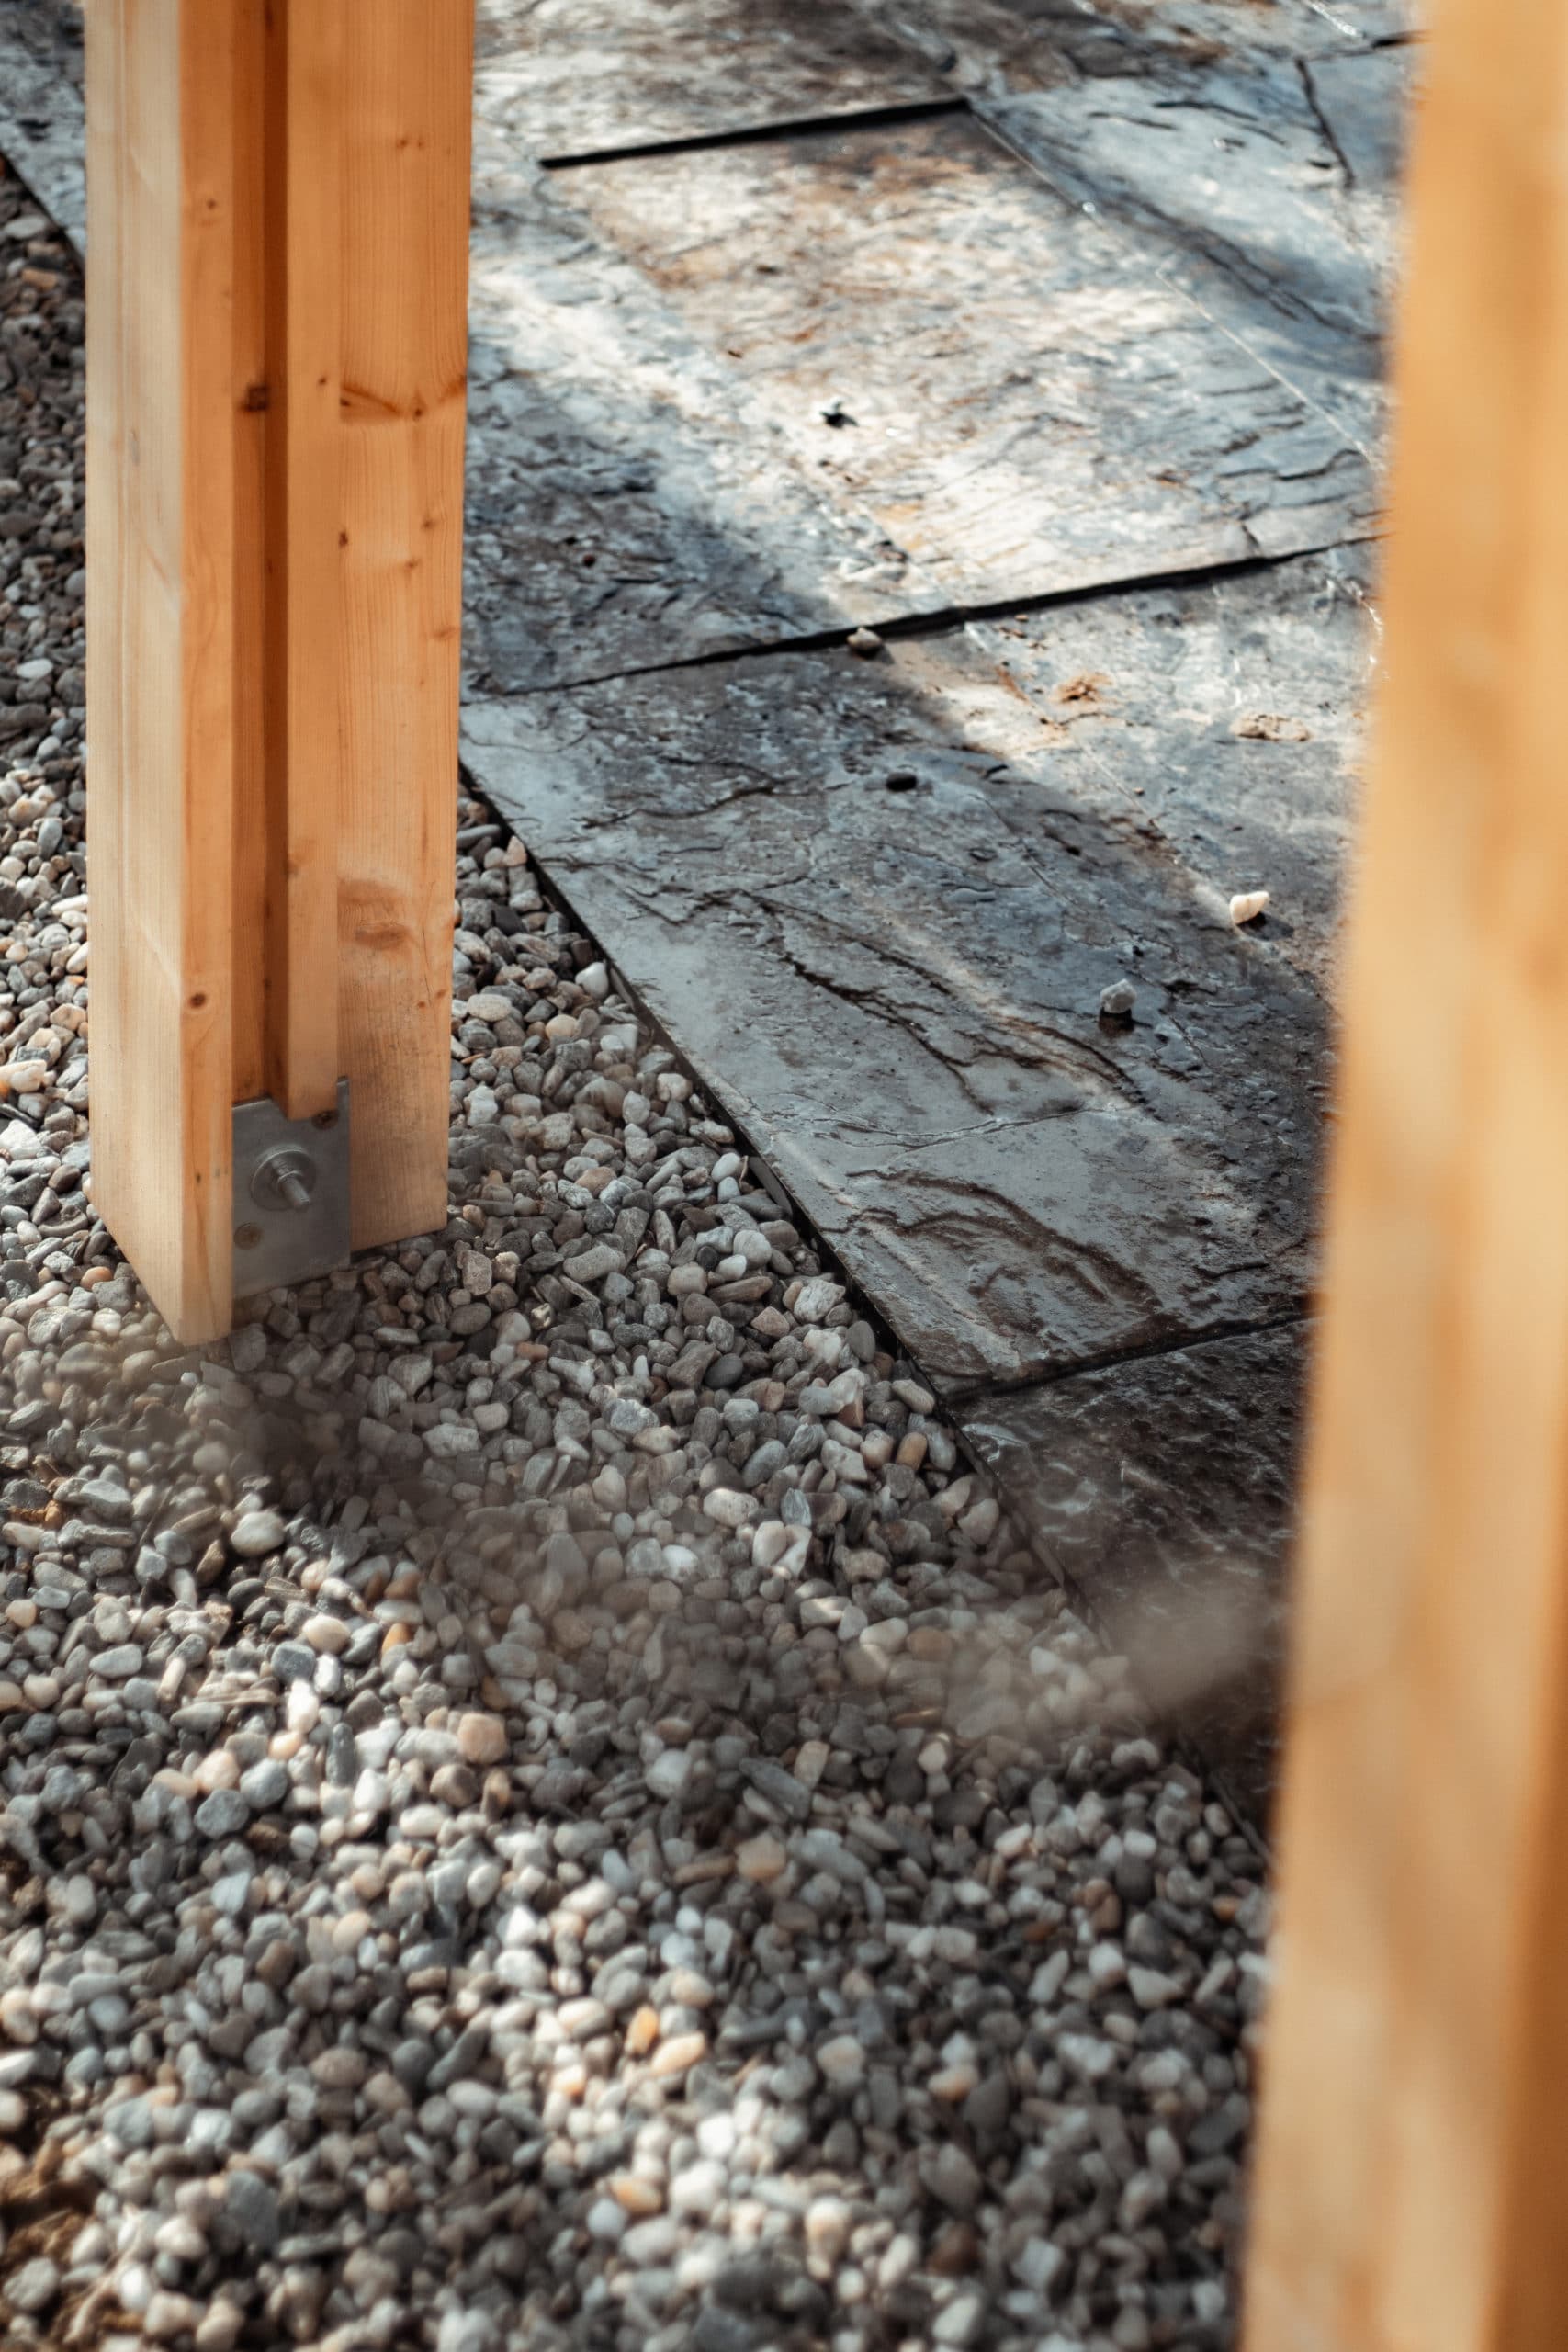
slate stone, 10 sqm = 230 euro
slate stone varnish treatment, 2 liters = 20 euro
TOTAL: 876.5 EURO
If you want to build it yourself, contact us and we’ll send you all the files and guides, free of charge!
- .....
 Article published on May 24th, 2020.By Razvan Socol, architect @OVERLAP.SPACE